Follow these steps to transfer your Minecraft world from your server to your computer. If you're looking to upload a world onto your server instead, then read this tutorial instead: How to upload a Minecraft World onto your Server
- The first step of downloading your world, is to login to FileZilla. We have a tutorial showing you how to download FileZilla: How to access your Minecraft Server files using FileZilla Once you've logged into FileZilla, you can then return back to this tutorial to follow the next step.
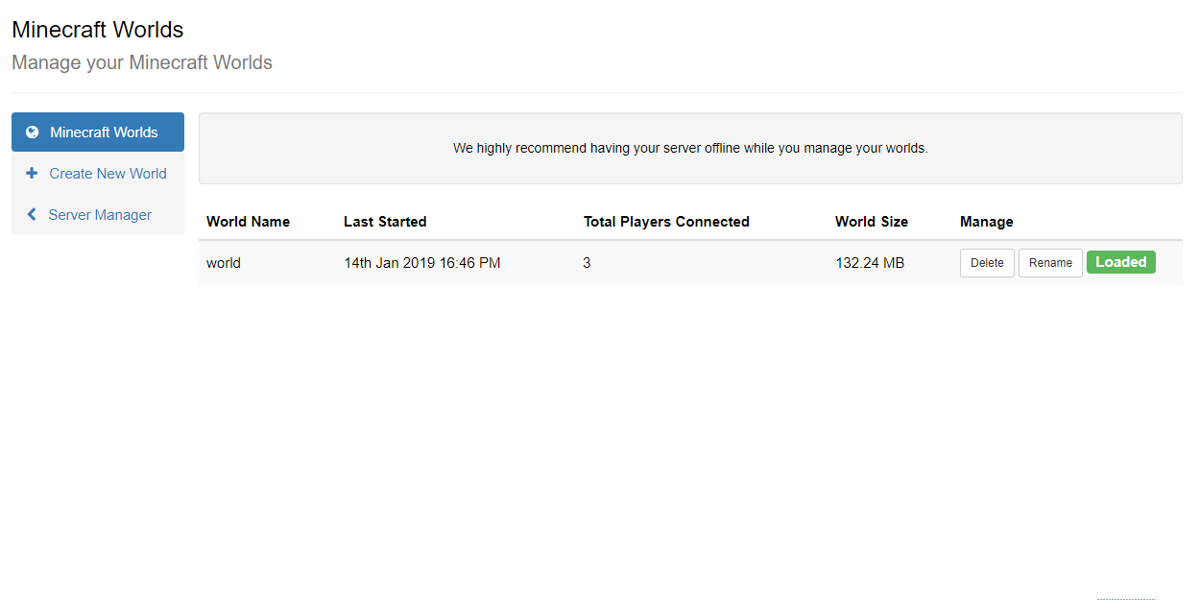
- Once you have logged into FileZilla, you'll be able to see all your server files. If you're unsure what your world is called, then you can navigate to the Worlds tab on the control panel. If you're running either Paper, Spigot or Craftbukkit then your nether and end will be split into different folders. For example, if your world is called world then you'll notice two other folders called world_nether and world_the_end. It's important to download all three folders. If you're looking to play on your world in Singleplayer or Vanilla Minecraft, you'll need to merge all three worlds into one folder. We have a tutorial to do that: How To Convert a Spigot / Paper World to Vanilla Minecraft
- In this example, we're looking for the Minecraft world called world. The left side of FileZilla is your computer and the right side is your server. Once you've located the folder, you can simply drag and drop the folder from your server onto your computer.
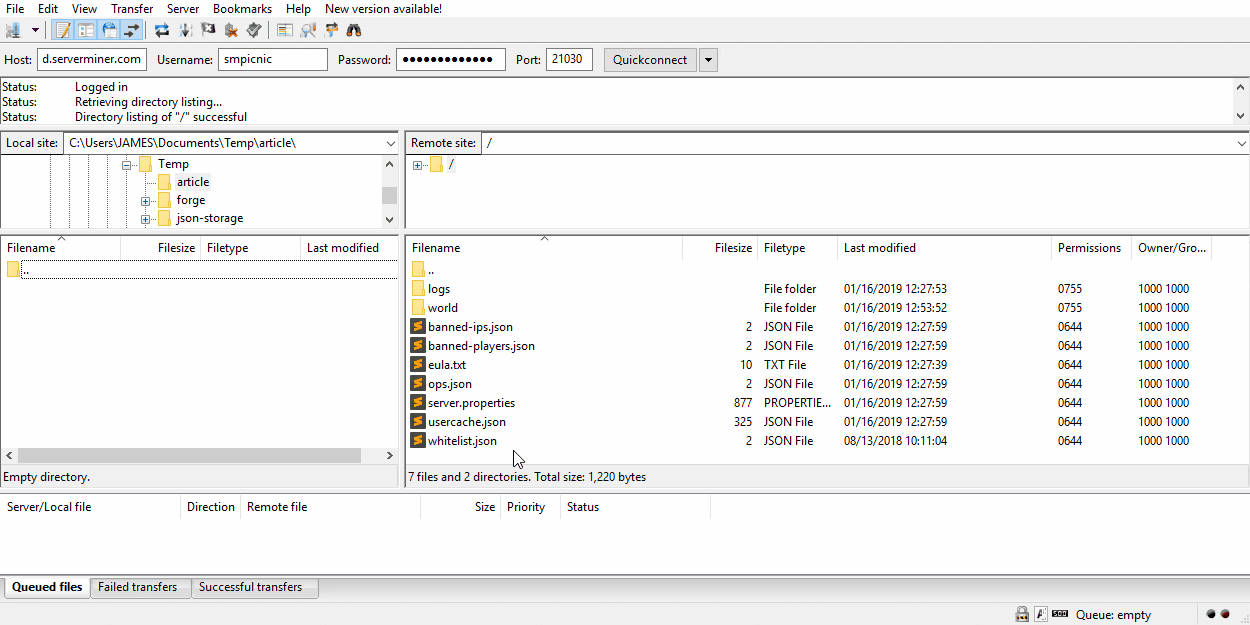
- The download time will vary depending on your internet speed and how large your world is. As you can see from above, the world was successfully transferred to our computer.
Happy mining! ⛏️