In this tutorial we will show you how to set up your own modpack server with any modpack available on CurseForge (Overwolf). ServerMiner lets you get a CurseForge server up and running easily with our built-in modpack installer.
Part 1 - Creating your CurseForge Modpack Server
- To get started, you'll need to first purchase a Minecraft Server through ServerMiner here: CurseForge Server Hosting.
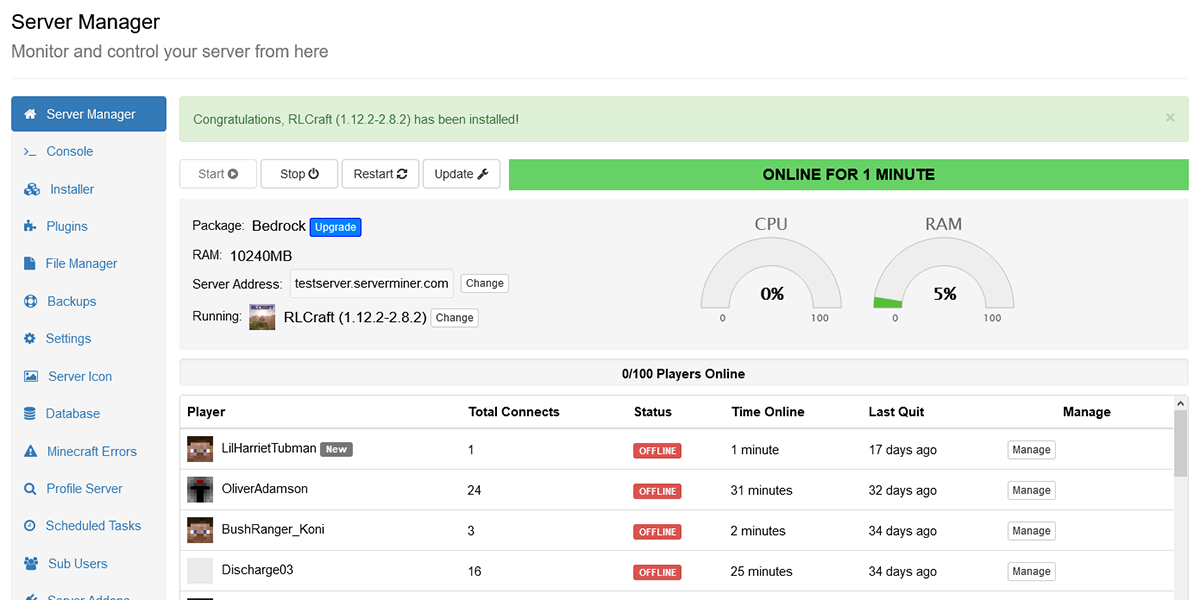
- The first step is to navigate to the CurseForge Installer page by clicking the Installer tab to the left and then clicking the CurseForge Installer page. You can then search for the modpack which you'd like to install and click the Install button. The control panel will then handle the entire install process for you! For this example, we will be installing RLCraft (1.12.2), but you may use any CurseForge modpack that you wish. (Even Custom Modpacks!)

- Once your selected CurseForge modpack is installed, your server will automatically start and will go Online. You may move onto connecting to your server.
If your server doesn't start, feel free to get in touch with us and we'll be happy to help.
Part 2 - Connecting to your CurseForge Modpack Server
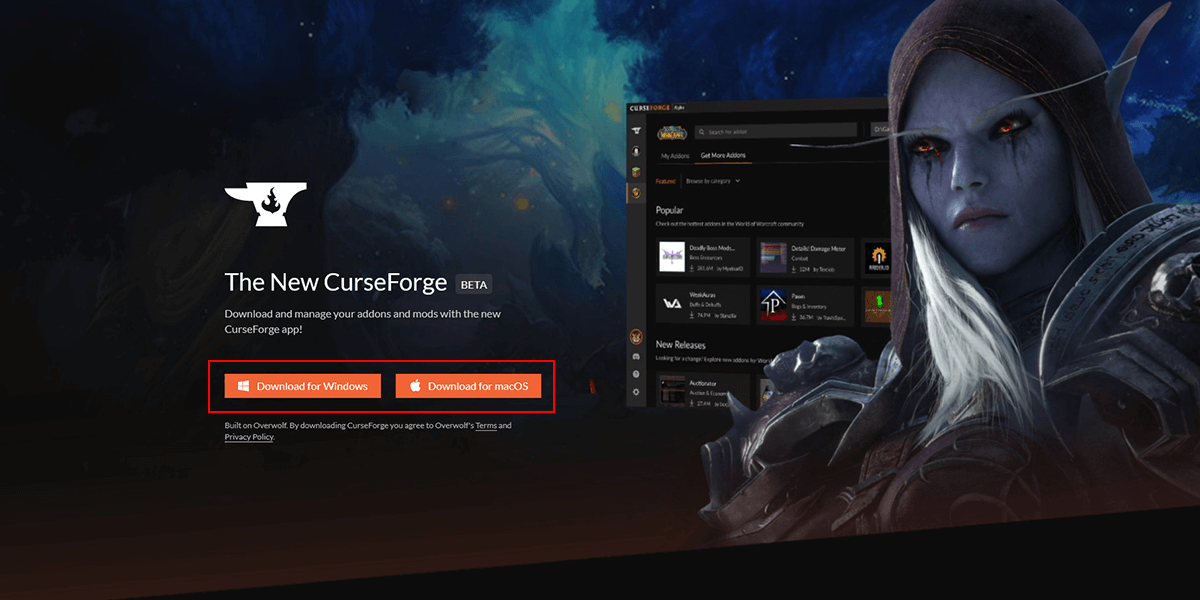
- To connect to your modded server, you'll need to install the same CurseForge modpack onto your computer. This can be done really easily by using the CurseForge Launcher through Overwolf. First, download the CurseForge Overwolf installer on your local machine by heading over to https://curseforge.overwolf.com/ and select the operating system that you are currently running on. A CurseForge Overwolf installer will then be downloaded.
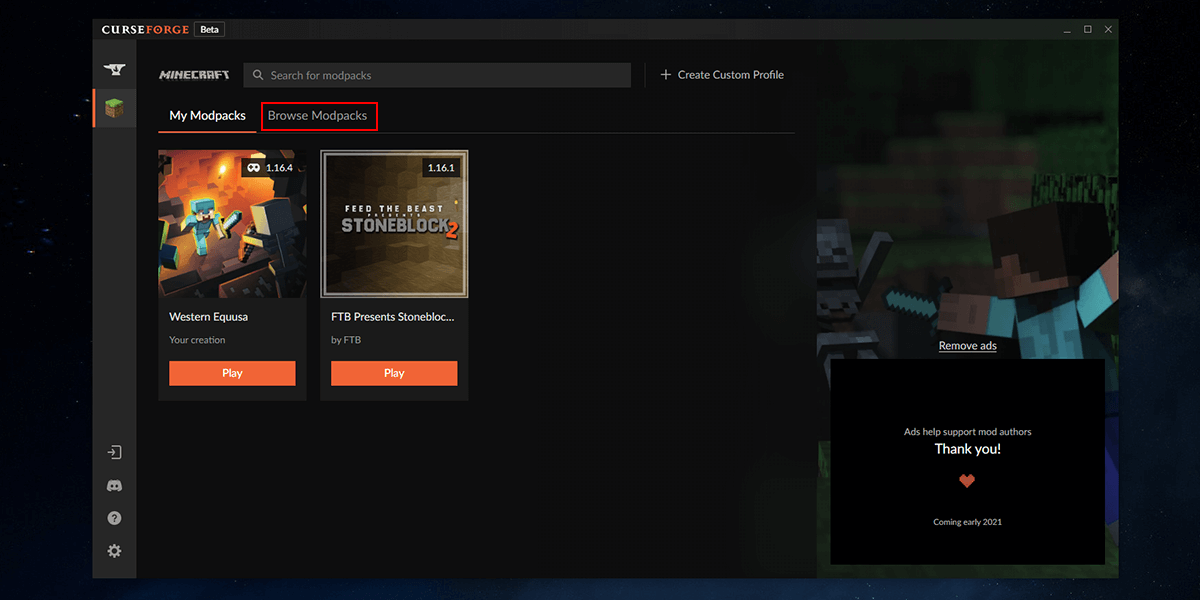
- Once the installer file has been downloaded, you can go ahead and open the downloaded CurseForge Overwolf installer. Overwolf will then be installed along with the CurseForge app. Once installed, you can go ahead and launch the CurseForge app and select Minecraft, then Browse Modpacks
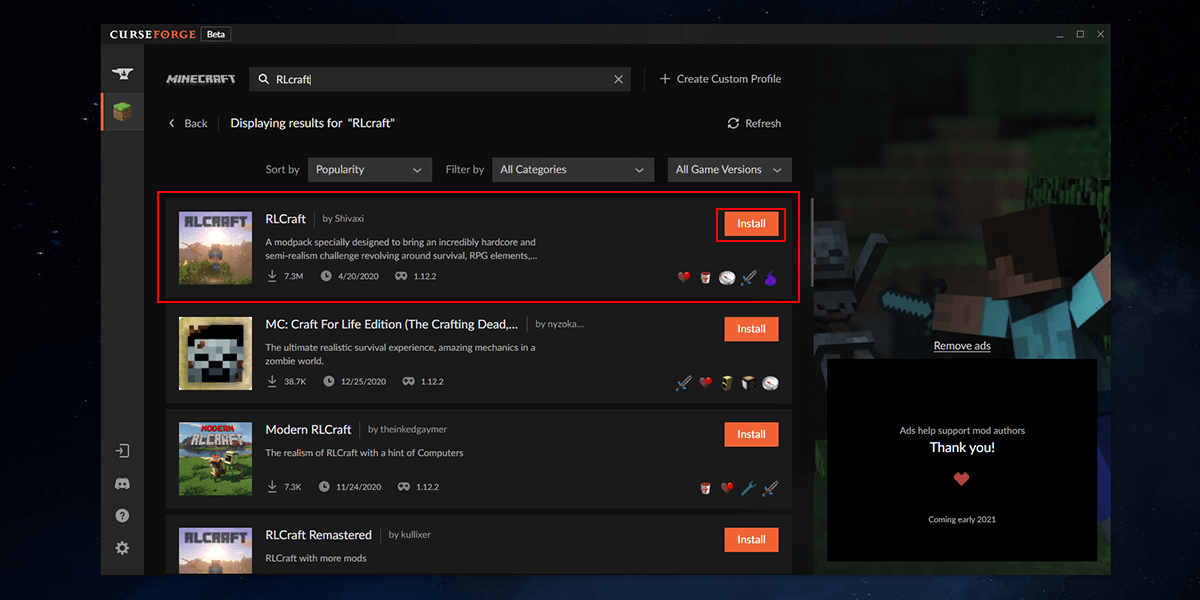
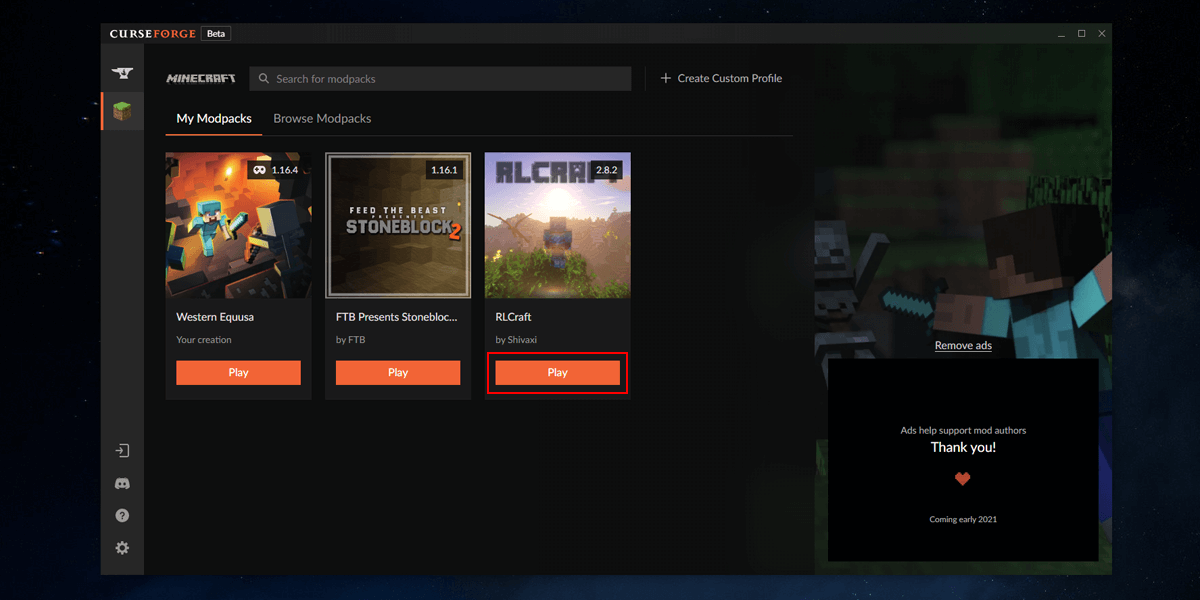
- Here you may search and select the modpack you have installed on your server. In this tutorial, we're installing RLCraft. Once you have found your modpack from the search, click the Install button to the right of the modpack.
- Once the modpack has been installed onto your computer, head back to My Modpacks and click the Play button. The Minecraft Launcher will then open up and you can sign in to your Minecraft account. Once you've signed in, the modpack should automatically be selected for loading, so just hit the Play button.
- The usual Minecraft installation will take place and your Minecraft Game Client will launch and bring you to the main menu. Each Main Menu might be different depending on the modpack!
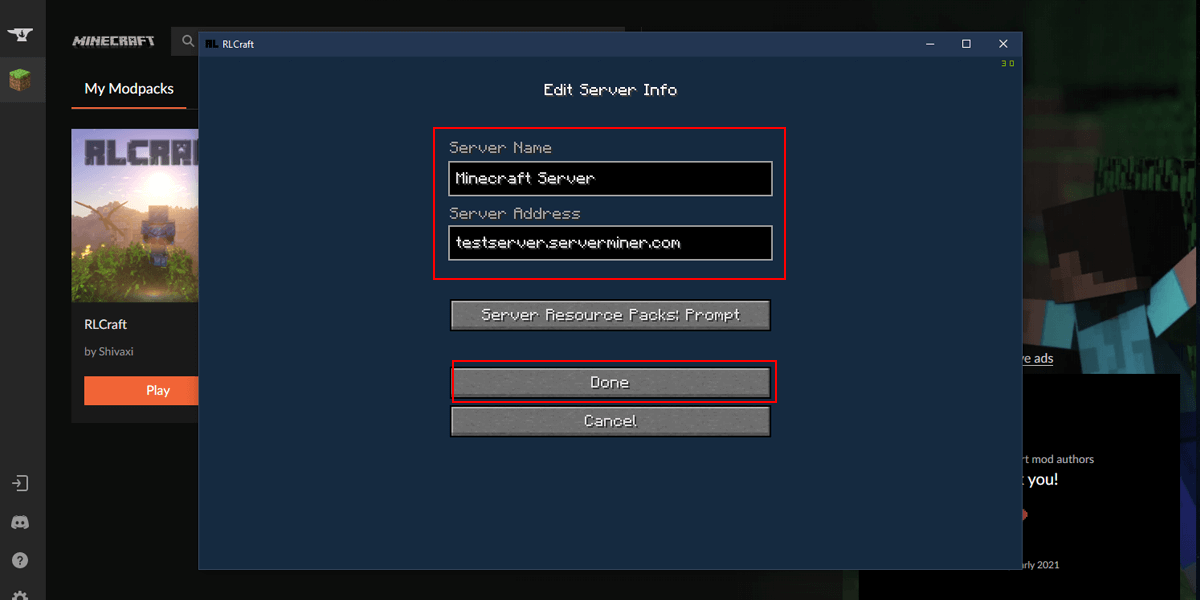
- Head over to the multiplayer section, add server and input your server details. You may write anything in the Server Name, this is to help you remember which server it is. As for the Server Address, input the IP found on the control panel. Click done and enter your server!
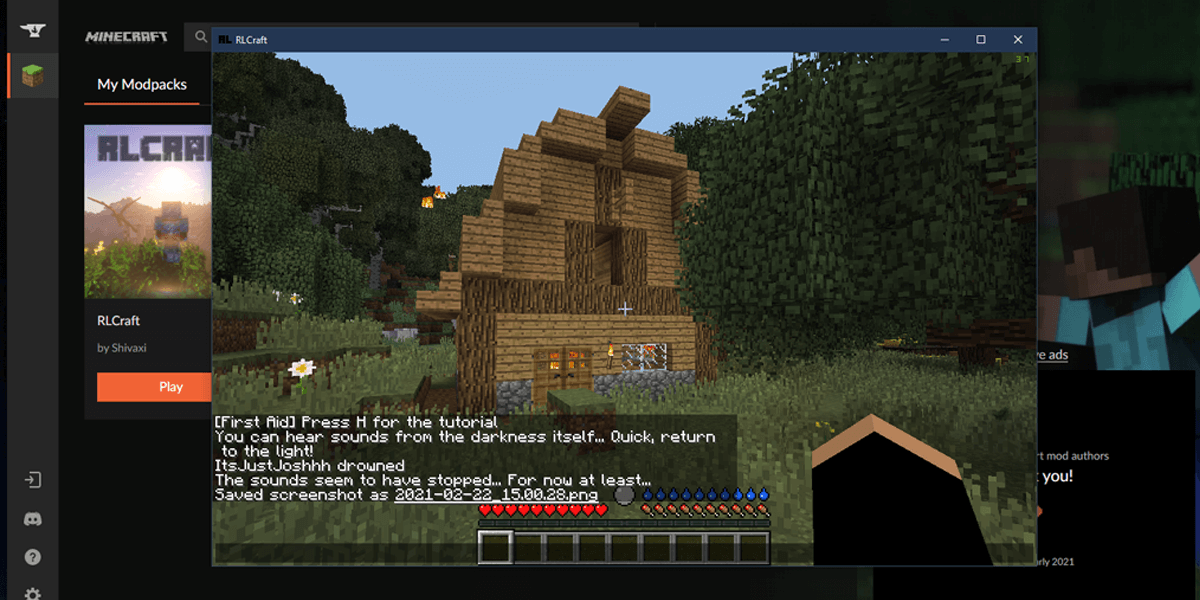
- You will now join into your very own CurseForge modpack server! Prepare for a brand new adventure in the world of modded Minecraft. Your server is hosted 24/7 365 days a year and runs completely independently from your own computer. This means that you can turn your home computer off and your friends can still play on your server.
TIP: It's always best to start a new modpack on a clean server, this helps prevent any accidental conflicts and issues. You can reset your server through the File Manager.
If you're still having problems setting up a CurseForge modpack on your server, feel free to contact our support team at https://serverminer.com/contact and we will happily help you resolve the issue!
Happy mining! ⛏️