In this tutorial, we will show you how to allocate more RAM to your Overwolf CurseForge launcher. We recommend increasing the allocated RAM if you're having troubles connecting to your server.
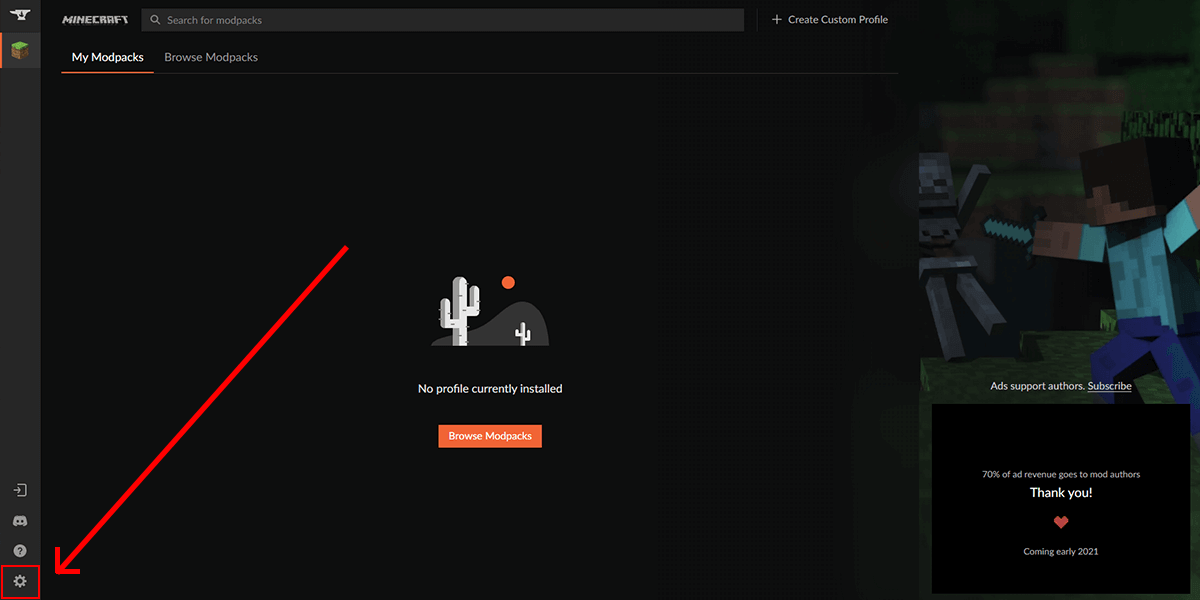
- Launch your Overwolf CurseForge Launcher and click on the Settings gear icon at the bottom left of the application, this will take you to the settings menu.
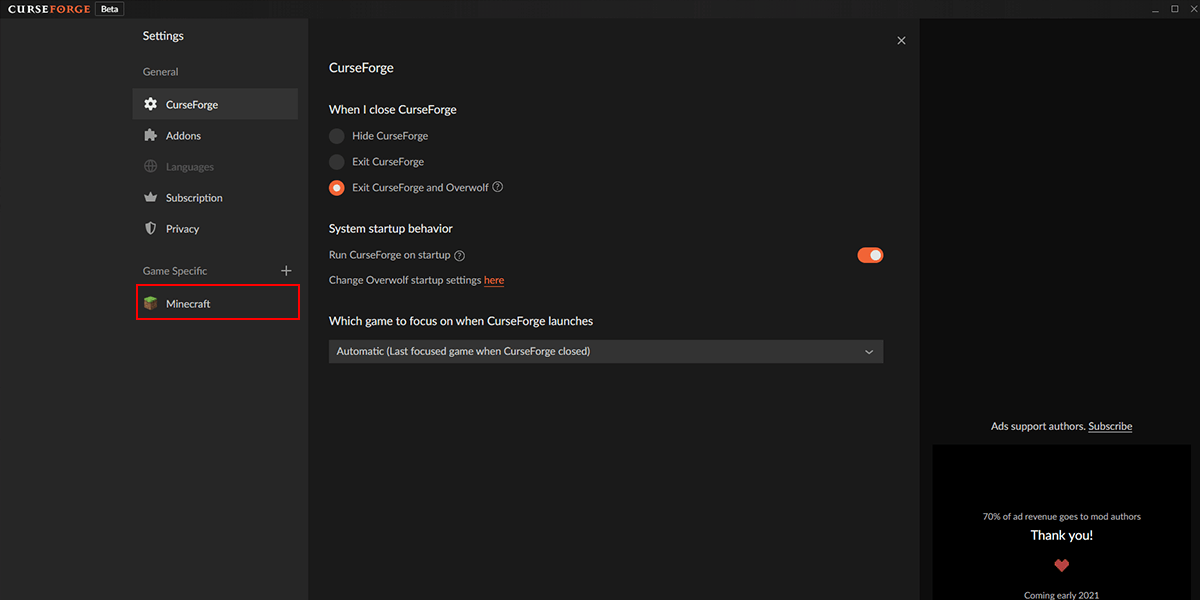
- On the left pane, select Minecraft under the Game Specific category. Here you will be presented with all the launcher's Minecraft options.
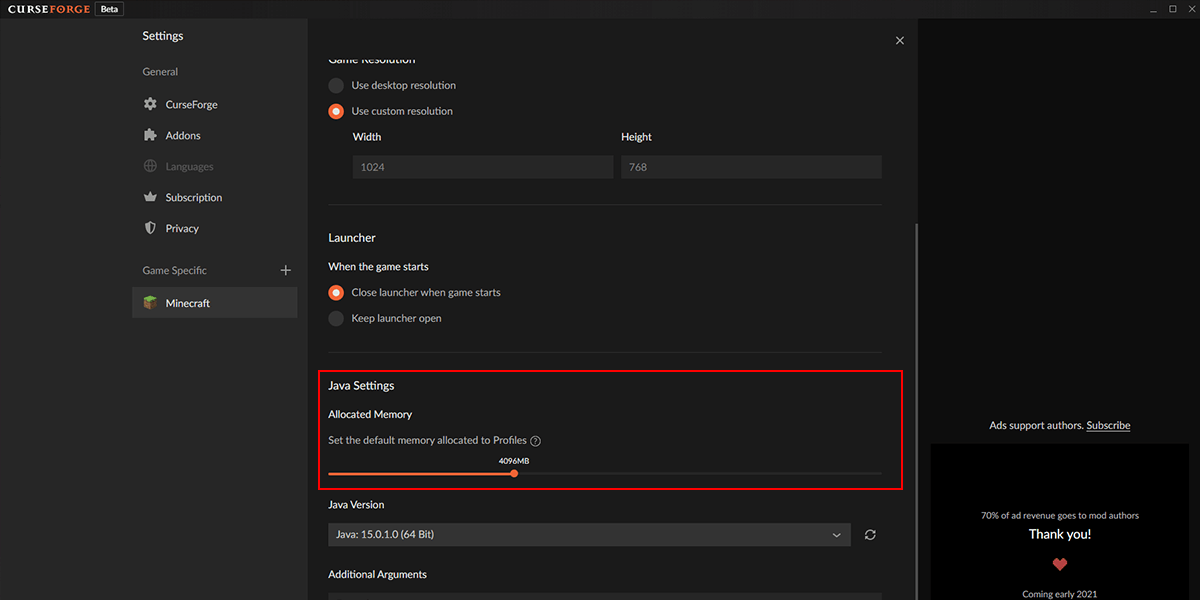
- On the right pane, scroll down until you find Java Settings. Under Allocated Memory, adjust to slider to your preferred RAM amount. It is advised to use atleast 4-6GB of RAM when running a modpack as they tend to require more RAM to load.
- The change automatically saves! Just close the settings and start up your favourite modpack. Your modpack will now load with extra RAM.
If you're still facing issues with allocating more RAM or you're unable to join your server, feel free to contact our support team at https://serverminer.com/contact and we will happily look into it for you!
Happy mining! ⛏️